Another day has almost come and gone.
Can't imagine what else could go wrong.
Sometimes I'd like to hide away somewhere and lock the door,
A single battle lost, but not the war.
'Cause tomorrow's another day
and I'm thirsty anyway
So bring on the rain.
-JoDee Messina
*****************
This sums up my day.
Today was a field trip day.
We arrived at the art museum and learned that the wrong tour was scheduled.
We went on the sculpture tour. It was outside in a WIDE open area.
The kids ran. They hopped. They talked A LOT . . .
The tour did not hold their interests.
We had extra time.
We walked on a narrow path with drop down on either side. A river to the left and woods to the right.
I learned about a student's fear of butterflies. The student took off running in the other direction as the butterfly crossed our path. Thankfully no one was knocked down or hurt.
There was confusion regarding where to meet the buses.
My plans are not done for next week. My materials are not in order.
I had to leave earlier than usual. G had an eye doctor's appointment.
**************************
I rushed to pick up Baby M.
She had a blow out!
I bolted to pick up G.
I got to the eye doctor on time.
Brent called during the appointment. He forgot snack for after B's baseball game at home. There was an accident and he wasn't able to make it to the game on time and get snack.
G's vision has stayed the same since February. We need to increase the eye drop days from 2 days to 3 days.
G did a great job at the eye doctor's office. We went to Starbucks for a treat.
********************************
I hurried home to get snack for B's team.
I got stuck in traffic. I turned around. I went the long way (40 minutes rather than 10).
I saw the last 5 minutes of the game.
B got a hit.
He also got to run home!
I passed out snack.
**********************
I headed for home.
My gas light dinged.
***********************
No, I'm not gonna let it get me down.
I'm not gonna cry
and I'm not gonna loose any sleep tonight.
'Cause tomorrow's another day
and I am not afraid
so bring on the rain.
-JoDee Messina

May 3, 2012

May 2, 2012
4:30 AM totally do-able
I wake up at 4:30 AM every morning (Monday - Friday) in order to have enough time to feed my daughter and get ready for work.
I hate it!
I wish I were doing more than simply surviving the cycle.
I would love nothing more than to simply stay home and take care of my sweet baby. I dream about how wonderful it would be to volunteer in B and G's classrooms.
Despite the fact that it is so early, each morning this is what I am greeted with . . .

4:30 AM doesn't get much better than this! I love this little girl.
Apr 30, 2012
The Planning Desk
In our kitchen we have an area we refer to as the planning desk. Basically it's an area with a small counter top, a middle drawer, and 3 small drawers along the side. Above the desk is a double cabinet.
We keep cook books, coloring books, play-doh, and messy projects in the cabinet. The drawers held a mess of junk that we weren't sure what to do with.
I have been meaning to 'fix' it up for awhile, but just haven't gotten around to it until shortly after Christmas when I was home on maternity leave. If I had been smart I would have taken before and after pictures. Oops, Sorry!
Here are the after pictures:
The left side of the cabinet. The right side of the cabinet.


Close up of the cabinet.
It seems as if my kids are given some sort of coloring/activity book for almost EVERY holiday! I used baby wipe containers with the lids taken off of them to help sort the books. I put a label on the outside of the box.

On the other side I used old containers with lids to sort crayons, markers, colored pencils, pencils, card games, and erasers. Again, I labeled the containers so that we would know what is inside each of them.

Brent likes to keep his keys in this cabinet. I put Command hooks on the inside of the door so that we can easily find keys. Can you guess which set is mine?

In the center drawer I used some small baskets to contain items so that they are not sliding all over the place. I also put some rubber non-slip grip stuff under the baskets so that they stay in place when the drawer is opened and closed.

This is the top drawer along the side. I put small baskets that link together in it. We keep our phone chargers in it along with MP3 players and GPS. I guess it's kind of like our mini-media drawer.

Next we have the homework drawer. Now B is only in Kindergarten, but he does have some 'homework'. G is in preschool he doesn't have homework, but he likes to do his 'work' when B is doing homework.
The items in this drawer can only be used for homework. This way B and G know where the items are and they are in good condition.
I have 'assigned' my kids a desiginated color. I started this for the scrapbooks that I make for them. I use the desiginated color in other ways as well. For example, B's color is blue. When I write events for him on the calendar I use a blue marker. This way when we see blue we know it's for him. G's color is green and Baby M's color is magenta.
In the drawer B has a blue kit with the things he needs to complete his homework. He can easily grab his box, go to the table, and complete his work. I did purchase the same boxes for G and Baby M just so they would all match and fit in the drawer.

B's homework box.

G's homework box contents.

The bottom drawer has an address book and some note cards.

So there you have it the organized planning desk! How do you keep things organized?
Check out these other areas that I have organized:
Liebster Blog Award Nominations
I would like to take a moment to personally thank Billy and Kimberly at Upscale Treasures for the
Liebster Blog Award nomination! The Liebster Blog Award is given to smaller blogs with less
than 200 followers that deserve recognition.

Be sure to head on over to blog their blog Upscale Treasures and check it out and give her some comment love <3
The rules of the award are:
1. Thank the person who gave you the award and link back to their blog.
2. Copy & paste the award to your blog.
3. Nominate 5 further blogs and let them know by leaving a comment.
I would like to nominate the following 5 blogs:
5. Toddlerisms
Apr 28, 2012
AWWW they love each other, they really do!
Last night B and G had yet another explosive argument over nothing other than 'the spot'. Now you may be asking yourself, What is this spot she is referring to?
Let me answer this for you. 'The spot' is the sink in the bathroom that both boys like to use to brush their teeth. I would like to share with you that there are not only 1, but 2 sinks in the bathroom, but they both like the same sink! Seriously, sometimes I don't even know why we bother!
Anyway during the argument they managed to wake Brent up, who had dozed off while trying to calm Baby M during her fussy time of the night.
*I just realize that this post is beginning to portray my children in a rather crabby light, oops!
So after wakingthe beast Daddy, B was sent to bed because get this . . . G nicely (meaning used manners and didn't whine) asked him to help put toothpaste on his toothbrush. Well B replied I'll only do it if you let me have the spot! (Nice, I know, right?! Such a proud Mommy moment for me. On a positive note I do like the thinking process he was using.)
G came downstairs totattle report the situation to me. Well it sounded to me as if Brent had taken care of everything. I finished what I was doing downstairs and headed upstairs to go to bed for the evening. I made a stop in B's room to kiss him goodnight. As I closed the door I was greeted with a slightly angry G who informed me (with his hands on his hips, tapping his foot at me and all) that HE wanted to kiss B goodnight too.


So there you have it . . . despite the fact that argue, call each other Bubbas (which I'm sure is code for jackass), and tell each other "I'm not your brother", at the end of the day they still love each other. I have to admit it makes my heart melt . . . just a little.
Let me answer this for you. 'The spot' is the sink in the bathroom that both boys like to use to brush their teeth. I would like to share with you that there are not only 1, but 2 sinks in the bathroom, but they both like the same sink! Seriously, sometimes I don't even know why we bother!
Anyway during the argument they managed to wake Brent up, who had dozed off while trying to calm Baby M during her fussy time of the night.
*I just realize that this post is beginning to portray my children in a rather crabby light, oops!
So after waking
G came downstairs to

Please notice the gun and knife magazine that he loves is on his headboard!

So there you have it . . . despite the fact that argue, call each other Bubbas (which I'm sure is code for jackass), and tell each other "I'm not your brother", at the end of the day they still love each other. I have to admit it makes my heart melt . . . just a little.
Apr 26, 2012
4 year old Hippo Birthday
Invitations and Thank you notes:
 |
The outside 
I put a wallet size picture of G from the party on the outside of the thank you note. The note was written on the back.
Email me at uniquelyerinnicole@gmail.com if you are interested in purchasing invitations or thank you notes.
 |
I removed wrappers from cans of fruit and washed them out. I then wrapped covers around the cans that had hippos stamped on them along with the hippos I made for the invitations. The covers can be removed and the cans can be recovered for another party.
Activities:

Binoculars:
First we made binoculars to use on a hippo hunt. We glued 2 toilet paper tubes together and wrapped card stock around the outside of them. 2 holes were punched to attach yarn. The kids decorated them with stickers.
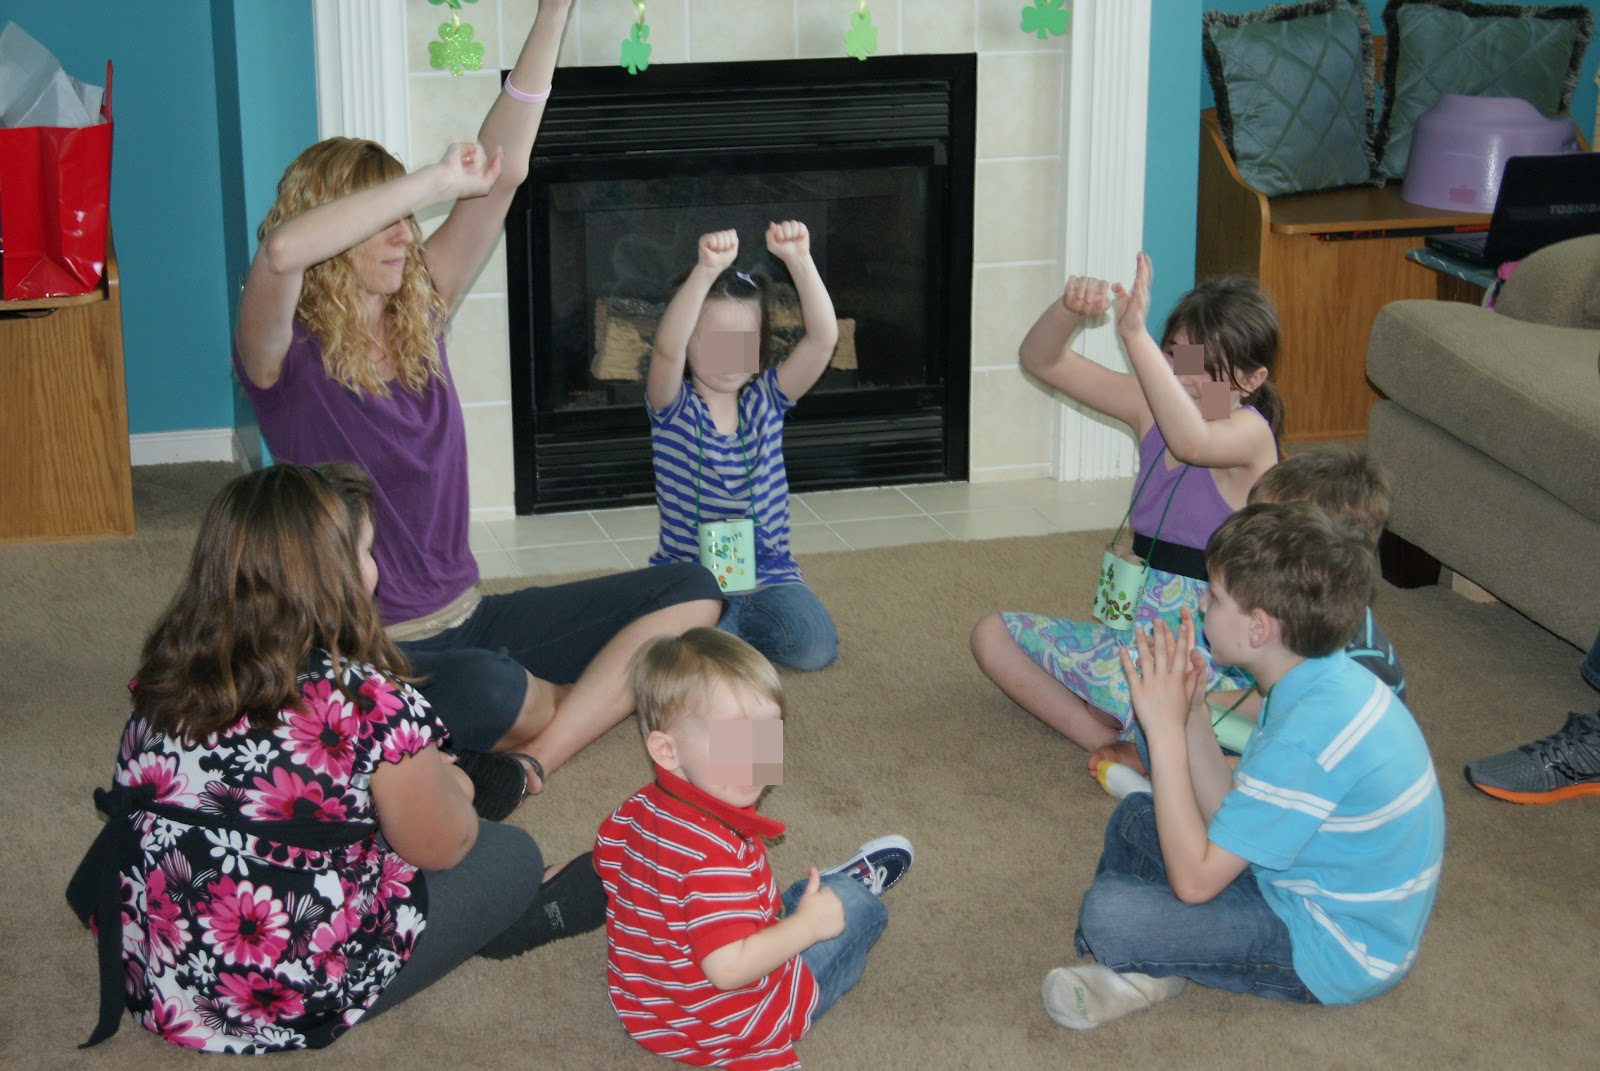
Hippo Hunt Song:
After making the binoculars we put them on and sat down for a song. I googled 'We're going on a Bear Hunt' and found a YouTube video with song. We sang the song and did the movement with the song. We said hippo hunt rather than bear hunt in the appropriate places.

The Hippo Hunt:
We followed clues in search of a hippo. The clues lead us to several different areas both inside and outside. The hippo was hiding in some grass!
 |
Showing the hippo some love |
Hippo Toss Game:
I used a poster board to create this hippo. My husband used wood to make the stand to attach the poster board to. It can be removed so we can create a new poster to use with future parties.
Cake:

I was so surprised when I was able to find these hippo plates and napkins!

Party Favor Bags:

I stamped 'Thanks' on the outside of a white paper bag along with a stamp of a hippo. I took G to the dollar store to pick out some goodies for his friends.
Apr 24, 2012
DIY Baby Wipes
When I was in college I worked at a daycare that was within walking distance of my dorm. I learned more lessons about life, myself, and parenting than I could have ever anticipated through this position. Like any job, it had it's ups and it's downs, but I met so many lovely people who have forever touched my life. To this day I have remained friends with several of them.
Because the daycare was so close to the college campus there were several college students who worked there in between classes. Work schedules were flexible and were easily manipulated around a new batch of classes each semester.
I had the pleasure of working with many different age groups of children. One summer I was disappointed when I was assigned to the infant room. My favorite age group was the 4 year olds. I had been moved out of that room because of my class schedule for the previous semester. I loved that I could have a 2 sided conversation with a 4 year old. I enjoyed coloring and playing dress up. We even had beauty shop days where I painted nails and created fancy hair styles. I couldn't do any of these things with infants. Heck most of them barley had any hair to speak of!
While I wasn't thrilled with the infant room, I decided that I would make the most of the situation. I enjoyed working with the main caregiver in the room and she tolerated and even grew to enjoy me as well. Looking back on the situation I think there were deeper reasons, rather than simply availability, for placing me in this room.
The main caregiver had worked in the infant room for many years and she ran the show. To put it nicely she liked things her way and if you followed her directions, picked up after yourself, and stayed out of her way, it would be a good day. Frankly, I was slightly intimidated by her at the beginning.
I soon learned that underneath this 'tough' exterior was a kind hearted, hard working grandma. She simply had been pushed around too much and put walls up to protect herself. Personal life experiences, that I was/am thankful to have never known, also added bricks to her walls.
She loved those babies. She knew each of their quirks and the meaning of their different cries. She taught me how to bounce two crying babies while feeding a third. I learned to invent personalized songs about the babies to calm them when they were fussy and I learned that sometimes a baby just needs to cry. She taught me that babies cannot be rushed and to be patient.
On the rare occasion that all six babies were taking a nap at the same time (I know the Mommies out there who have more than one baby are getting a good chuckle right now) we talked and I got to know the personal side of her. She enjoyed taking creative holiday pictures of the babies and making presents of footprints and hand prints for the parents. She also made these fabulous baby wipes.
I recently made the wipes to use with Baby M. To be honest I'm not sure why I have waited until baby #3 to make these, but I did. That is a mystery that may never be solved!

Wipe Recipe:
What to use:
2 cups water
2 tablespoons baby wash
2 tablespoons baby oil
1 roll of paper towel (cut in half)
The Process:
In a bowl stir the water, baby wash, and baby oil together. Cut the paper towel roll in half. Put the roll in an air tight container and pour the solution over it. Let it sit for 30 minutes. Pull the center tube out. Turn the container over and let the solution sit for 30 minutes. Pull the wipes out from the center and they are ready to use.
*When I purchased my container I had forgotten that the paper towels needed to be cut in half. I purchased a container that I thought would be tall enough for an entire roll of paper towels. It's really made for a loaf of bread. I just doubled the recipe when I made the solution because I used a whole roll rather than a half.
My Opinion:
The wipes were very easy to make. They have worked very well to clean up a baby bottom. They smell really good! I have heard, but I have not experienced, that after awhile some of the wipes sour. I will post an update if this occurs.
If you try these wipes please let me know what you think.
What hidden lessons have you learned from previous or current jobs?
***Update 6/5/12***
Price Break Down:
28 oz. of baby wash costs $4.97 (at Walmart)
I used 2 tablespoons (1 liquid oz. = .5 tablespoon) of baby wash. This would equal $0.71.
20 oz. of baby oil costs $2.47 (at Walmart)
I used 2 table spoons (1 liquid oz. = .5 tablespoon) of baby oil. This would equal $.0.25.
Because the daycare was so close to the college campus there were several college students who worked there in between classes. Work schedules were flexible and were easily manipulated around a new batch of classes each semester.
I had the pleasure of working with many different age groups of children. One summer I was disappointed when I was assigned to the infant room. My favorite age group was the 4 year olds. I had been moved out of that room because of my class schedule for the previous semester. I loved that I could have a 2 sided conversation with a 4 year old. I enjoyed coloring and playing dress up. We even had beauty shop days where I painted nails and created fancy hair styles. I couldn't do any of these things with infants. Heck most of them barley had any hair to speak of!
While I wasn't thrilled with the infant room, I decided that I would make the most of the situation. I enjoyed working with the main caregiver in the room and she tolerated and even grew to enjoy me as well. Looking back on the situation I think there were deeper reasons, rather than simply availability, for placing me in this room.
The main caregiver had worked in the infant room for many years and she ran the show. To put it nicely she liked things her way and if you followed her directions, picked up after yourself, and stayed out of her way, it would be a good day. Frankly, I was slightly intimidated by her at the beginning.
I soon learned that underneath this 'tough' exterior was a kind hearted, hard working grandma. She simply had been pushed around too much and put walls up to protect herself. Personal life experiences, that I was/am thankful to have never known, also added bricks to her walls.
She loved those babies. She knew each of their quirks and the meaning of their different cries. She taught me how to bounce two crying babies while feeding a third. I learned to invent personalized songs about the babies to calm them when they were fussy and I learned that sometimes a baby just needs to cry. She taught me that babies cannot be rushed and to be patient.
On the rare occasion that all six babies were taking a nap at the same time (I know the Mommies out there who have more than one baby are getting a good chuckle right now) we talked and I got to know the personal side of her. She enjoyed taking creative holiday pictures of the babies and making presents of footprints and hand prints for the parents. She also made these fabulous baby wipes.
I recently made the wipes to use with Baby M. To be honest I'm not sure why I have waited until baby #3 to make these, but I did. That is a mystery that may never be solved!

Wipe Recipe:
What to use:
2 cups water
2 tablespoons baby wash
2 tablespoons baby oil
1 roll of paper towel (cut in half)
The Process:
In a bowl stir the water, baby wash, and baby oil together. Cut the paper towel roll in half. Put the roll in an air tight container and pour the solution over it. Let it sit for 30 minutes. Pull the center tube out. Turn the container over and let the solution sit for 30 minutes. Pull the wipes out from the center and they are ready to use.
*When I purchased my container I had forgotten that the paper towels needed to be cut in half. I purchased a container that I thought would be tall enough for an entire roll of paper towels. It's really made for a loaf of bread. I just doubled the recipe when I made the solution because I used a whole roll rather than a half.
My Opinion:
The wipes were very easy to make. They have worked very well to clean up a baby bottom. They smell really good! I have heard, but I have not experienced, that after awhile some of the wipes sour. I will post an update if this occurs.
If you try these wipes please let me know what you think.
What hidden lessons have you learned from previous or current jobs?
***Update 6/5/12***
Price Break Down:
28 oz. of baby wash costs $4.97 (at Walmart)
I used 2 tablespoons (1 liquid oz. = .5 tablespoon) of baby wash. This would equal $0.71.
20 oz. of baby oil costs $2.47 (at Walmart)
I used 2 table spoons (1 liquid oz. = .5 tablespoon) of baby oil. This would equal $.0.25.
6 rolls of paper towel costs $8.47 (1 roll = $1.42) (at
Walmart)
I used ½ of a roll. This would equal $0.71.
1 batch of the DIY wipes made 176 wipes and costs me $1.67. This means I am spending $0.01 per wipe.
According to Walmart.com 1 package of 64 Huggies
wipes costs $2.37. This breaks down to $0.04 per wipe.
Subscribe to:
Posts (Atom)